Tips & Strategies
Pokémon Quest Ingredient Farming: Colours, Routes & Costs
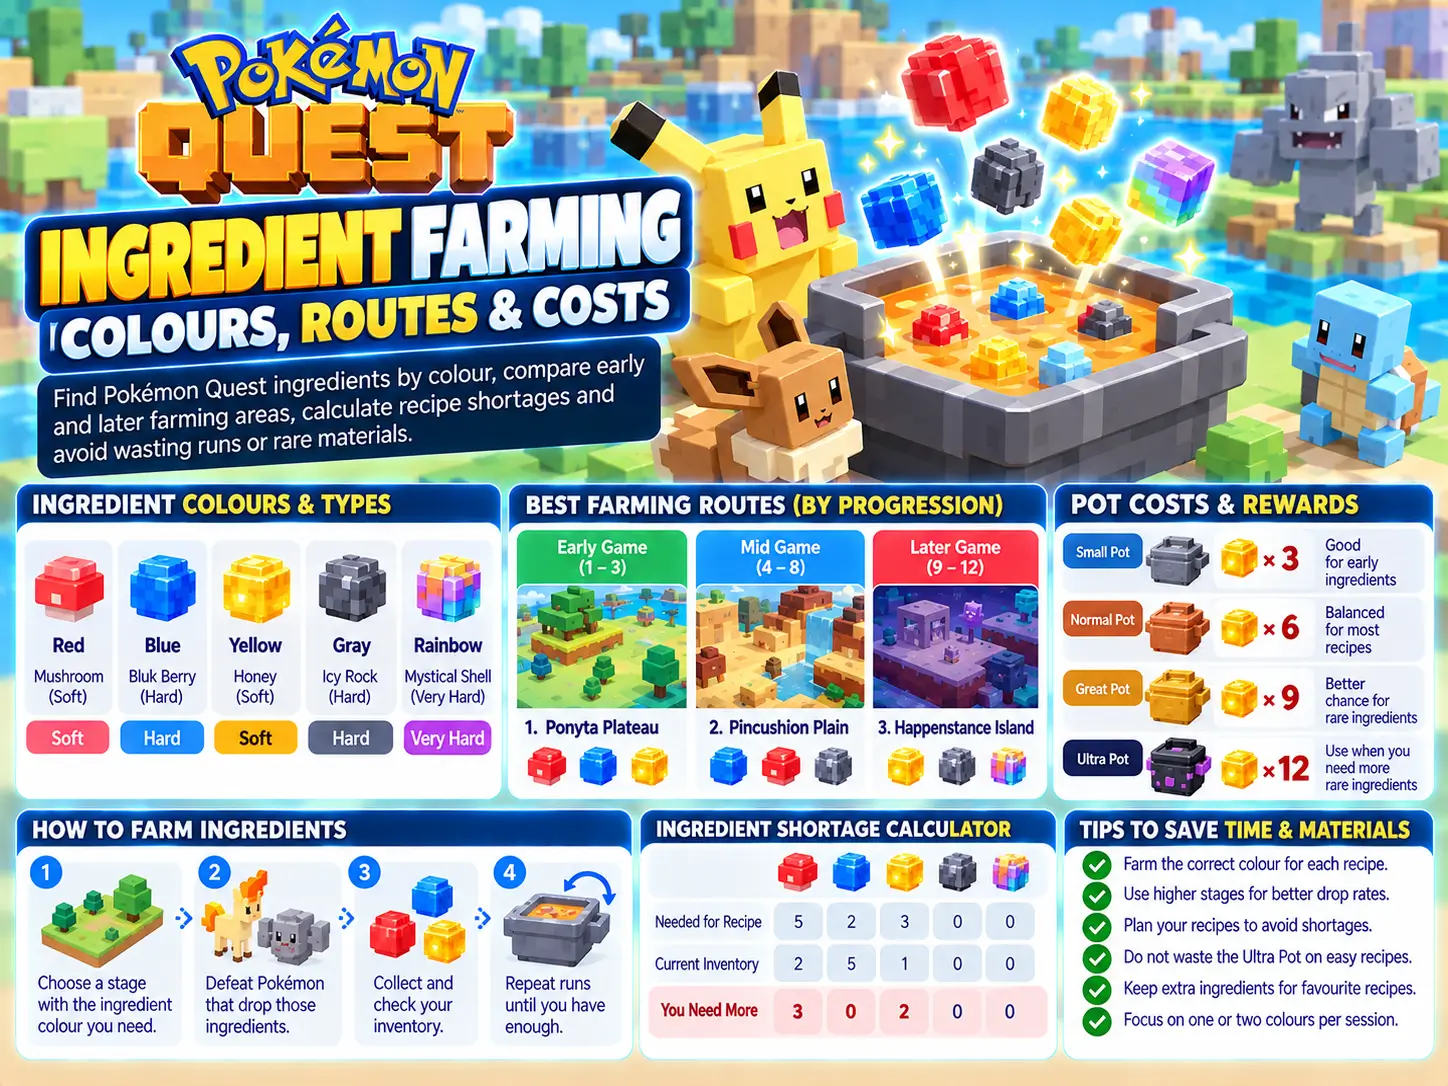
Farm the colour you are missing in an area your team can clear reliably. Calculate your recipe shortage first, then compare useful drops and time instead of assuming the hardest stage is always best.
Choose an ingredient, then choose a colour
| Colour | Ingredients | Early area to compare |
|---|---|---|
| Red | Tiny Mushroom, Big Root | First Steppes |
| Blue | Bluk Berry, Icy Rock | Backforth Brook |
| Yellow | Apricorn, Honey | Gloomy Grove |
| Gray | Fossil, Balm Mushroom | Parched Peak |
These are useful starting areas from published farming references, not guaranteed drops. The ingredient-colour display helps you compare areas you have unlocked. A blue-heavy area can provide blue ingredients, but it does not promise that every blue drop will be Bluk Berry rather than Icy Rock.
For later progression, the same reference highlights Pincushion Plain for yellow, Hushed Highlands for blue, Nightlight Nook for red and Farside Fjord for gray. Only use a later area if your team can clear it reliably enough to make the trips worthwhile.
Calculate the shortage before farming
Start with the complete pot cost, then subtract what is already in your bag. If three Basic Staryu batches need 27 Bluk Berry and you own 15, the shortage is 12 berries. If you already have the required mushrooms, additional red farming does not solve that shortage.
Do the same calculation for each ingredient in the mix. Keep the result as a small shopping list. It gives you a clear stopping point and prevents you from farming a colour just because your last expedition dropped plenty of it.
The pot-cost guide matters here: the same five-slot recipe can spend very different quantities in different pots. Check the pot before setting your target.
Compare usable ingredients, not just the hardest stage
Try a small run log for two areas you can already clear. Record the time, whether you finished, and the number of the ingredient you actually needed. Five runs are enough to start noticing practical problems, but not enough to establish a precise hidden drop rate.
| Example only | Wanted ingredient collected | Total minutes | Wanted items per minute |
|---|---|---|---|
| Area A test | 18 | 12 | 1.5 |
| Area B test | 24 | 24 | 1.0 |
In this invented example, Area A supplies the wanted ingredient faster even though Area B gives more in total. Your game results may be different. Include failed runs in time spent; leaving them out makes an unreliable stage look better than it is.
If you mostly play on auto, compare auto clears. A route that needs constant manual attention may not fit the way you actually play.
Use decorations for the resource you need
Ingredient decorations affect drop size. Examples include the Blastoise Fountain for blue, Charizard Torch for red and Mechanical Tauros for gray. Read each item’s description and cost in the shop before deciding which matches your shortage.
Owned decorations apply their effects without needing to be placed around camp, according to Serebii’s decoration reference. Moving one closer to the cooking pot is not a way to target a species or guarantee an ingredient.
Do not buy a decoration only because a guide labels it “best.” Compare your planned recipes, current stock and available PM Tickets. A boost for a colour you rarely need may solve less than a boost for the ingredient stopping your next several cooks.
Keep Mystical Shell farming separate
Mystical Shell belongs to late-game Happenstance Island expeditions. Ordinary colour farming should not be presented as an early-game Shell route. If that area is not unlocked, focus on team progression rather than expecting Shells from an early red or blue area.
A Shell route still involves uncertain drops. Budget several runs and record what you receive without treating an empty result as proof of a broken game. Use the legendary recipe guide before spending the Shells you obtain.
A simple farming loop
- Pick one documented recipe and your pot.
- Calculate the exact shortage for each ingredient.
- Choose an unlocked area that favours the missing colour.
- Record clear time, failures and useful ingredients over several runs.
- Stop when you have the planned batch budget, then cook.
If your stock still disappears faster than expected, check whether you changed pots or upgraded the recipe quality. Farming more is not the only answer; the quality guide can help you spot an unnecessary expensive substitution.
Sources and useful next steps
These references support the game facts above. Recipe probabilities are community reference values; individual results can differ.

About the author
Rizwan Aslam is the creator of Pokémon Quest Recipes. This guide explains documented game mechanics and practical planning examples; it does not claim independent drop-rate testing.
About Rizwan · How we check our guides · Report a correction